3.7.3. Detailed Installation Procedure for the Open edX Platform#
This section describes the process for installing the Open edX platform and related extensions in order to build the main piece of the GTC platform. In order to perform this installation more efectively, a standardized docker image is used.
3.7.3.1. Install the Required Tooling in the Machine Where the Installation Will Be Performed#
Install Docker Engine: v20.10.15+
Install Docker Compose: v2.0.0+
Install TVM.
In a terminal that uses bash, run the following command to install TVM:
pip install git+https://github.com/eduNEXT/tvm.git
Verify the installation:
tvm -- version
3.7.3.2. Create and Activate the Project with TVM#
Create a new project with TVM.
tvm project init <project-name> <tutor-version>

# For example:
# tvm project init gtc v15.3.7
Open the project folder.
cd <project-name>
Activate the project environment.
source .tvm/bin/activate
Create the base files for your project.
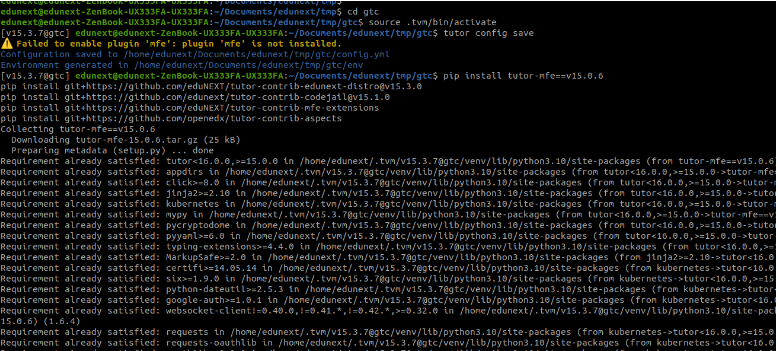
tutor config save

3.7.3.3. Install All Tutor Plugins the Platform Requires#
Install in the TVM environment the following tutor plugins: MFE, distro, codejail, mfe-extensions, aspects:
pip install tutor-mfe==v15.0.6
pip install git+https://github.com/eduNEXT/tutor-contrib-edunext-distro@v15.3.0
pip install git+https://github.com/edunext/tutor-contrib-codejail@v15.1.0
pip install git+https://github.com/eduNEXT/tutor-contrib-mfe-extensions
pip install git+https://github.com/openedx/tutor-contrib-aspects
For example:
3.7.3.4. Configure the Platform Using the config.yml#
Tutor uses a config.yml file to configure the platform to be deployed. You can find that file inside your project directory.
If you want to explore or download an example of a config.yml you can visit this link: eduNEXT/gtc-configurations
3.7.3.4.1. Add the Tutor Plugins that Are Going to Be Enabled#
In the variable PLUGINS inside the config.yml file, add the plugins as in the following example:
{
 "PLUGINS":
      "- mfe"
      "- distro"
      "- codejail"
      "- aspects"
}
3.7.3.4.2. Add Extra Credentials (Optional)#
Example:
{
  "MONGODB_PASSWORD": "your_strong_password",
  "MONGODB_USERNAME": "edxapp_stage"
}
(In this example, we will ignore this step because it is optional.)
3.7.3.4.3. Add Domains for Different Services (Optional)#
Example:
{
  "LMS_HOST": "YOUR_MAIN_DOMAIN",
  "CMS_HOST": "YOUR_STUDIO_DOMAIN"
}
(In this example, we will ignore this step to use the default domains.)
3.7.3.4.4. Override Configurations for Some Tutor Plugins#
Some Tutor plugins have their variables, and we can override them in the config.yml file.
We must override some MFE variables for this example to have our validation panel.
{
  "MFE_DOCKER_IMAGE": "docker.io/ednxops/ednx-mfe:olmo-20231010-unesco-mfe-extensions",
  "MFE_VALIDATION_PANEL_MFE_AP":
   "name": "validation-panel",
   "port": "2001",
   "repository": "https://github.com/edunext/frontend-app-validation-panel.git",
   "version": "master"
}
3.7.3.4.5. Decide the Platform Image to Be Used#
Tutor and TVM use Docker images to create containers that launch the platform.
{
  "DOCKER_IMAGE_OPENEDX": "docker.io/ednxops/public-distro-edxapp:olmo-unesco-v19",
}
3.7.3.4.6. These Are All the Configurations We Will Add to Our config.yml#
{
 "DOCKER_IMAGE_OPENEDX": "docker.io/ednxops/public-distro-edxapp:olmo-unesco-v19",
 "MFE_DOCKER_IMAGE": "docker.io/ednxops/ednx-mfe:olmo-20231010-unesco-mfe-extensions"
 "MFE_VALIDATION_PANEL_MFE_APP":
  "name": "validation-panel",
  "port": "2001",
  "repository": "https://github.com/edunext/frontend-app-validation-panel.git",
  "version": "master"
 "PLUGINS":
      "- mfe"
      "- distro"
      "- codejail"
      "- aspects"
}
For example:

3.7.3.4.7. Synchronize the config.yml File with the Tutor Settings#
To save our config.yml correctly, we run in the terminal the following command:
tutor config save
Note
Performing this action, the order of the config.yml can change to alphabetical order, and you will see other configurations.
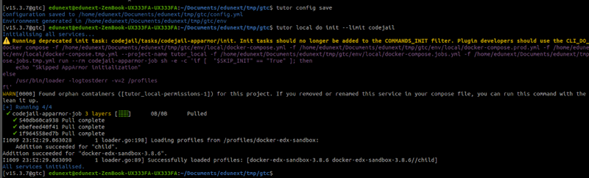
3.7.3.5. Start the Codejail Service#
The codejail tutor plugin enables the execution of untrusted code in secure sandboxes using an external service based on the codejail library.
This service needs to be initialized before the launch. Run the following command to do it:
tutor local do init --limit codejail
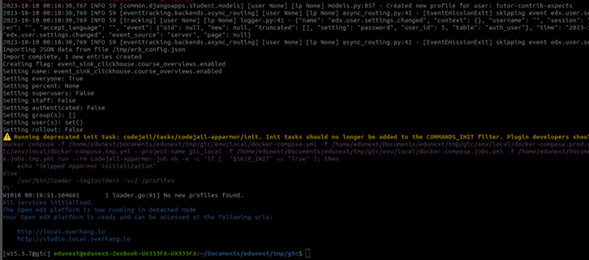
3.7.3.6. Run the Launch Process#
This configures and runs the platform.
tutor local launch
Note
This action may take a while. It depends on the processing speed of your machine and your internet.
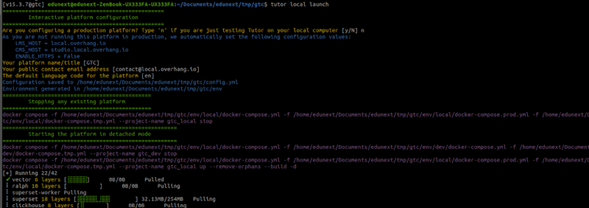
The expected result from the launch will look like this:
3.7.3.6.1. Start the Platform#
Stop the previous launch.
tutor local stop
Init all the process.
tutor local init
Start the platform.
tutor local start --skip-build
Note
In this tutor version, by default, they try to build images every time we start, and we don’t want that. We want to use the current image.
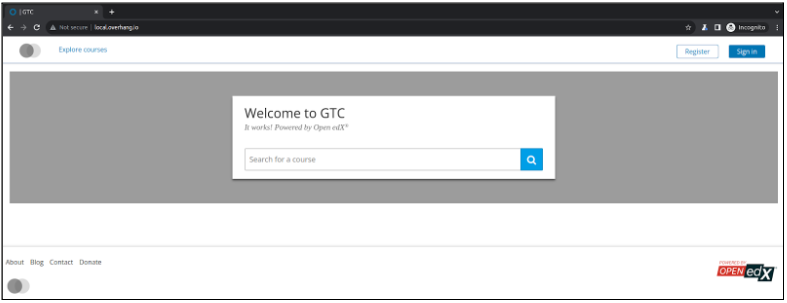
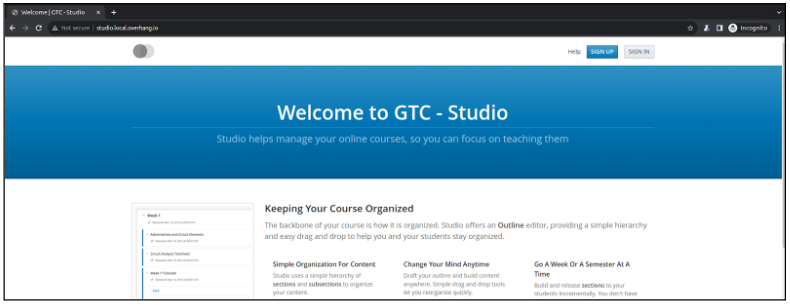
3.7.3.7. Verify the Success of the Start Process#
You should be able to enter these URLs following and see the platform:
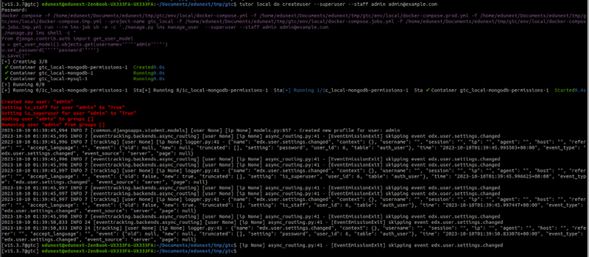
3.7.3.8. Create an Admin User#
After launching the application, creating an admin user to perform administrative actions on our platform would be helpful.
You can create an admin user with the following command:
tutor local do createuser --superuser --staff admin admin@example.com
For example:
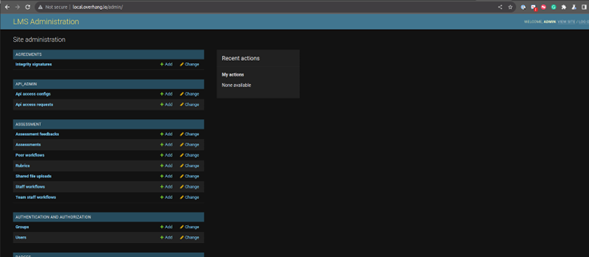
3.7.3.9. Verify the Admin Ability to Login to the Platform#
Log in to the LMS: http://local.overhang.io/
Enter in the admin site: http://local.overhang.io/admin/